If you've noticed your ebike's range dropping shorter than usual, or it feels less powerful on hills, your battery might be losing capacity over time. Testing ebike battery capacity at home is a smart way to check its health without expensive tools. A simple digital multimeter can help you get a good idea of what's going on by measuring voltage, which tells you a lot about the battery's condition.
This guide walks you through how to test ebike battery with a multimeter step by step. It's an easy DIY method most riders can do in minutes.

Understanding Ebike Batteries Basics
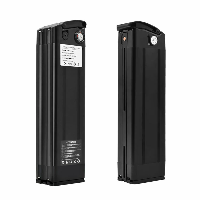
Most modern ebikes use lithium-ion batteries, commonly in 36V, 48V, or 52V setups. Battery capacity is measured in amp-hours (Ah) or watt-hours (Wh)-it basically shows how much energy the battery can store and how far you can ride on a charge.
Over time, capacity fades due to charging cycles, temperature extremes, or age. Voltage testing with a multimeter gives a quick snapshot: a healthy full charge should hit close to the battery's maximum voltage. Low readings often mean reduced capacity.
What You'll Need and Safety First
Before starting your ebike battery test with multimeter, gather these:
- A digital multimeter (cheap ones work fine)
- Safety gloves and eye protection
- Your ebike charger (to fully charge the battery first)
- Safety tips when testing ebike battery:
- Always fully charge the battery before testing for accurate results.
- Work in a well-ventilated area away from flammable materials.
- Never short the terminals-lithium batteries can overheat or catch fire if mishandled.
- Disconnect the battery from the bike if possible.
Step-by-Step: How to Test Ebike Battery Voltage with a Multimeter
Here's the simple process to check ebike battery health using a multimeter:
- Set up your multimeter: Turn the dial to DC voltage (marked with "V" and a straight line). Choose a range higher than your battery's rating-like 60V or 200V for a 48V battery.
- Locate the terminals: Find the positive (+) and negative (-) outputs on your battery pack (usually red and black connectors).
- Connect the probes: Insert the red probe into the positive terminal and black into the negative. Hold them firmly.
- Read the voltage: Note the number on the display. For best results, test right after a full charge.

Interpreting the Results: Ebike Battery Voltage Chart
Compare your reading to these typical values for fully charged lithium-ion ebike batteries:
|
Battery Type |
Full Charge Voltage (100%) |
Healthy Range (Full to Empty) |
Warning Low Voltage |
|
36V |
Around 42V |
42V to 30V |
Below 30V |
|
48V |
Around 54.6V |
54.6V to 42V |
Below 42V |
|
52V |
Around 58.8V |
58.8V to 45V |
Below 45V |
If your full charge is much lower (e.g., a 48V battery only reaches 52V), capacity has likely dropped significantly-time to consider replacement.
Limitations of Multimeter Testing for Capacity
A multimeter is great for quick voltage checks and spotting major issues, but it doesn't directly measure true capacity in Ah or Wh. Voltage can look okay at rest even if the battery sags under load or has lost real energy storage.
For a more accurate ebike battery capacity test, try riding a known distance on a full charge and comparing to when it was new, or use a dedicated discharge tester.
Tips to Maintain Your Ebike Battery Health
To keep capacity strong longer:
- Store at 50-70% charge in cool, dry places.
- Avoid full discharges regularly.
- Don't leave it on the charger forever.
- Check for swelling or damage periodically.

Regular testing with a multimeter helps catch problems early. If your ebike battery capacity test shows big losses, exploring high-quality replacement options can get you back to full range and performance. Ride safe!